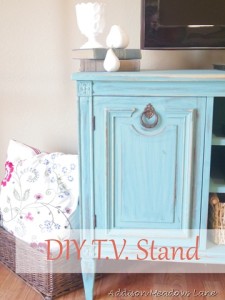
Oh how I love me some Craigslist! I scowered it for months looking for just the right piece of furniture for a TV stand. Everything I looked at just wasn’t right. Either the price was to high or the piece just didn’t look right. Then just when I was about to give up and put the TV on the floor…. The heavens opened up angels were singing and there she was!! In all her 40.00 dollar glory! Oh no that’s not a typo… 40.00 American dollars is all I paid for this beauty!
I know what you’re thinking, YOU’RE GOING TO PAINT THAT!!!! Yes I am. I realize she was gorgeous the way she was but I just can’t leave well enough alone. Plus she had some major water damage on top that I couldn’t stop staring at! So lets get on with it.
What You’ll Need
This post contains affiliate links for your convenience. This means I’ll get a tiny compensation for directing you to products I used at no cost to you. For my full disclosure click HERE
- Sandpaper – I used a 60 grit to lightly rough up the wood surface. I didn’t fully sand it no need because I primed it.
- A foam roller
- Medium Paint brush
- Smaller paint brush to get in the cracks and crevic
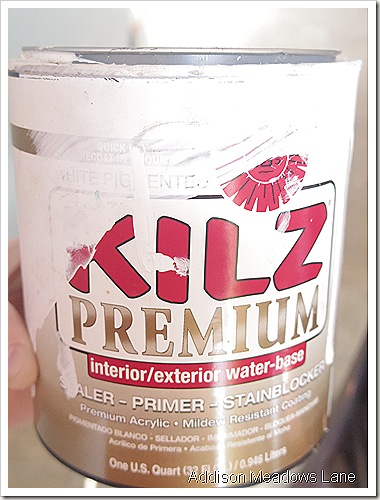
- Primer- I used Kilz water based primer for this project. In my opinion Kilz is the best. I never have an issue with it not sticking.

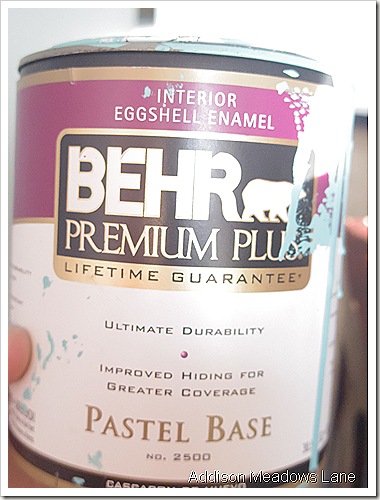
- Paint- I used Behr pastel base, it’s got a similar finish to chalk paint. I found this at a recycle store for a 1.00 SCORE!!!
I started by removing the 3 middle drawers ( You can see the creative way I repurposed the drawers here) to make places for our cable box, DVD player, and a shelf for storage (I had a basket that fit perfectly, so I used it but it’s not necessary) .
- Then lightly sanded it, just enough to get the shine off nothing major.
- After it was Sanded I wiped everything down with a damp cloth and let dry. (just a few mins.)
- Now time for the fun part, PAINT IT!!
- I used the roller first to cover the large areas, then went back over it with the large paint brush. I think brush strokes give a piece of furniture a nice subtle aged look.
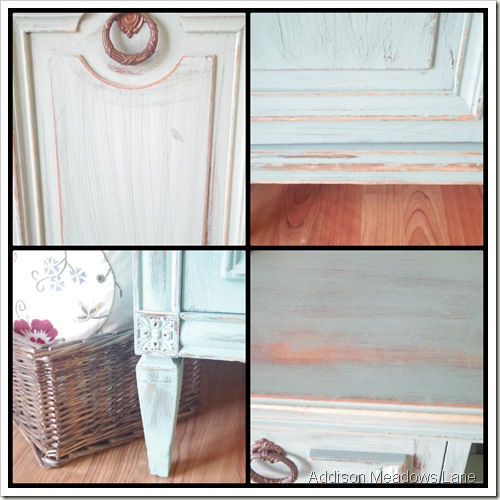
- After the paint dried I got my sand paper back out and sanded the paint off in places where an older painted piece would have normal wear and tear. Don’t be afraid of this step worse case scenario you can just repaint it. Examples below:

So just to show her off a Little more here are a few more pictures of this beauty.
Awwww So nice now if I can just get the Man Part to hide the cords for me she’ll be perfect!
Thank you so much for stopping by! If you have any questions drop me a comment and I’ll do my best to answer.
Have a Great Day!
-Stacey
Link Me Up Scotty! I’m linking up Here
26 Comments on TV Stand From A Buffet (A Tutorial)
2Pingbacks & Trackbacks on TV Stand From A Buffet (A Tutorial)
-
[…] is exactly why I don’t throw things away. These drawers came from the Buffet Turned TV Stand, and of course as we were cleaning out the garage the man part In all his glory kept saying “Just […]
-
[…] TV Stand From Dresser DIY Crate TV Stand China Hutch Turned TV Stand DIY Corner Media Center Plans TV Stand From A Buffet Amazing Dresser Turned TV Stand Wood Planks & Concrete Blocks TV Stand TV Stand Ikea Hack DIY […]


Elizabeth Chic
04/11/2013 at 6:29 PM (12 years ago)Very lovely. The color is great.
Stacey
04/12/2013 at 9:30 PM (12 years ago)This is a great TV stand!!!!
Ralinn
04/13/2013 at 12:42 AM (12 years ago)I love it. The color is fabulous.
Bre Ketel
05/06/2013 at 4:54 PM (12 years ago)This is beautiful! Just a quick question… after the original sanding, did you prime, paint and then sand?
stacey
05/06/2013 at 7:48 PM (12 years ago)Thank you! And yes I sanded lightly,primed,painted, and then sanded again.
Thanks for dropping by.. anymore questions just let me know!
-Stacey
Angela
05/14/2013 at 6:36 PM (12 years ago)This look marvelous! Thanks for linking with HickoryTrail
Angela
Nicole
05/14/2013 at 9:37 PM (12 years ago)This looks so good! I am new from southern charm! I would love for you to check out my blog and follow me back! Nicole
Beverly
05/16/2013 at 1:38 PM (12 years ago)This is a great TV stand. You did a fabulous job painting on it.
Have a great day
Bev
@ Eclectic Red Barn
stacey
05/16/2013 at 2:10 PM (12 years ago)Thanks so much Bev! I’m glad you like it!
rachel
06/09/2013 at 10:37 PM (12 years ago)oh i love this! 🙂
http://wildflowercreavtive.blogspot.com
Mayra
08/04/2013 at 4:39 AM (12 years ago)I just love what you did with this piece!! I love love love the color, can you tell me what Behr color this is?
Thank you!
stacey
08/07/2013 at 1:59 PM (12 years ago)Thank You so much for the comment! I got this color from a recycle store and all the tags had worn off so I don’t know what color it is I’m Sorry.
Nancy
08/31/2013 at 4:26 AM (12 years ago)Fabulous, and funny I have been looking for the same solution for some time and today I found EXACTLY the same buffet ! My piece was minus the original pulls on the doors and top drawer but I had three that work perfectly and it also has the two bottom original handles.. your piece is missing those .. My plan is to refinish the top leave it wood finish and remove only the top drawer
Jennifer
02/11/2014 at 3:59 PM (11 years ago)Do you know that color name? It’s perfect
stacey
02/11/2014 at 5:58 PM (11 years ago)No I’m sorry I don’t. I got the can of paint from the recycle store the sticker with the color was worn off, so wish I knew because it really is a gorgeous color.
melissa
04/07/2014 at 4:46 AM (11 years ago)SAME BOAT but I have been looking off and on for a year! Just brought one home today. Just did search on pinterest for tv buffet and there you are…almost exact same style, drawers removed, and color I wanted! Can’t wait to get started! Yay! How long did it take you to put a coat on?
stacey
04/07/2014 at 9:29 AM (11 years ago)I only did one coat. I think I had it done in an afternoon if I remember correctly. Thanks so much for stopping by!
Summer
08/31/2014 at 7:30 PM (11 years ago)Hi there!
This may be silly.. but will you post a picture of the whole wall around your awesome stand?
Thanks! 🙂
stacey
09/08/2014 at 7:02 PM (11 years ago)Hey summer, I posted one today I’ll be doing a much more detailed post this week. Thanks for stopping by!
Deann
09/20/2014 at 3:14 PM (11 years ago)I love this…..beautiful color! Thank you so much for showing your beautiful work!
Kat
01/28/2015 at 7:26 AM (10 years ago)What a beautiful refinish! I love the knobs and the paint color. Thanks for sharing!
Jacqueline
02/13/2015 at 11:27 PM (10 years ago)I love this…just what I’ve been looking for! But I’m curious, did you have to put anything down in place of where you removed the center drawers?
stacey
02/18/2015 at 10:05 AM (10 years ago)Yes, we removed the drawer tracks and just cut a thin piece of wood to cover the shelves. It’s not necessary it just ,akes it look more finished. Thank you so much for stopping by!
Carla DeLonjay
02/15/2015 at 1:25 AM (10 years ago)Your piece turned out great! I haven’t found my piece yet but this is exactly what I want to do!! I didn’t realize I would need to prime it first after the sanding!! I am so glad I found your post an took the time to read it. With spring around the corner an yard sales ahead I can’t wait to find that special piece an use your steps to make mine as beatiful as yours! Your technique is just the look I’m goin for! Thank u bunches!!