Shewww. This whole “I’m just gonna turn a dresser into a kitchen island’” thing has been a little more time consuming than I had originally planned, but then again nothing I do usually goes the way I plan. HaHa. Here’s my first post about the Dresser into a Kitchen Island, just in case you missed it. Also to jog your memory this is what we started with.
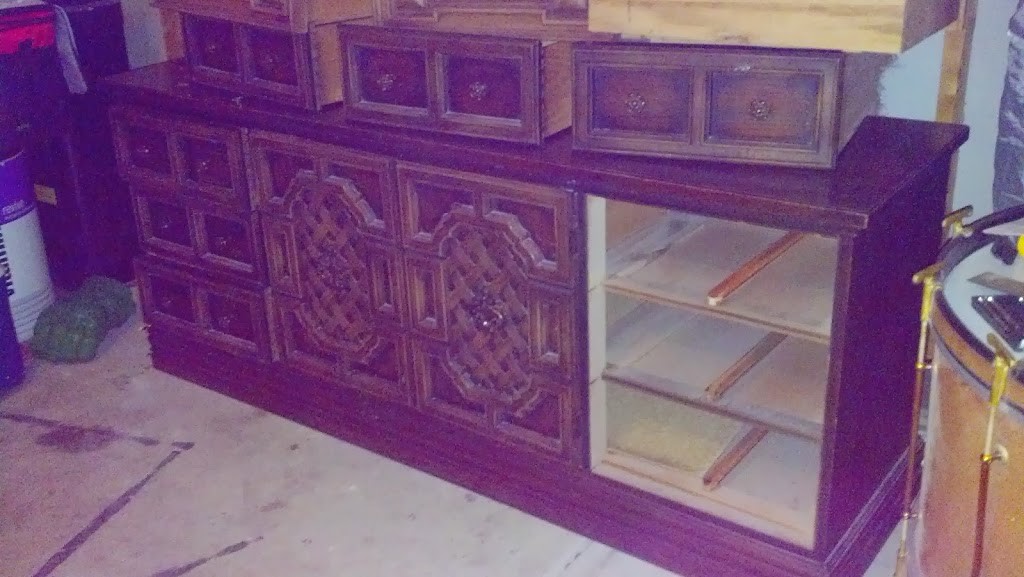
So the second part of this project is all about the paint, and let me tell you this part was actually quite hilarious. I honestly hated every color I put on it. No kidding. But it all finally came together when I decided to distress it.
*****This Post contains affiliate links for your convenience. For my full disclosure policy go HERE****
Ok so here’s what I did.
- I cleaned all the surfaces thoroughly with Fantastik. The reason I use that is it has a degreaser in it and gets rid of all the oil left from years of people touching the dresser.

- I used Zinser Oil based primer and painted the entire piece. *Note the drawers had plastic on them that was made to look like wood, so on those and the doors I used Rustoleum spray primer. I then let the primer cure for 24 hours on everything. I recommend this so your primer will stick for good.
- I then painted the whole piece, drawers, and doors this color:
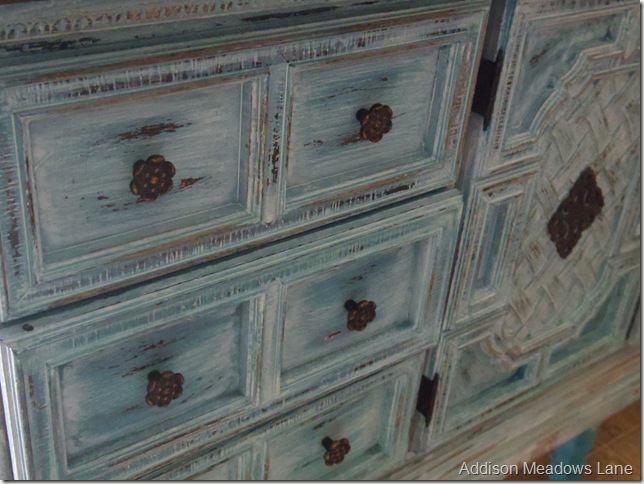
AND this my friends is where it all went awry! The color was so powerful. So I did what any normal person would do. I got out my emerald green paint, mixed it with water( I’d say 70/30 water to paint) and painted over the whole thing. This my friends was not awesome, it was even worse! So me being me I refuse to sand it down,re-prime, and paint it. My solution??? White wash IT!! So I got out some white laytex paint I had and mixed it with water( 70/30 water to paint) and went over the whole piece. You guys, it looked awful. I laughed hard at myself in the garage for like 10 mins. Then I cried. Then I rocked in the fetal position for like 10 mins. After all that, I started sanding it to re-prime and paint it, and behold the beloved de-stressed look! It looked awesome! All the dark wood started poking through and toning everything down itwas perfect!!
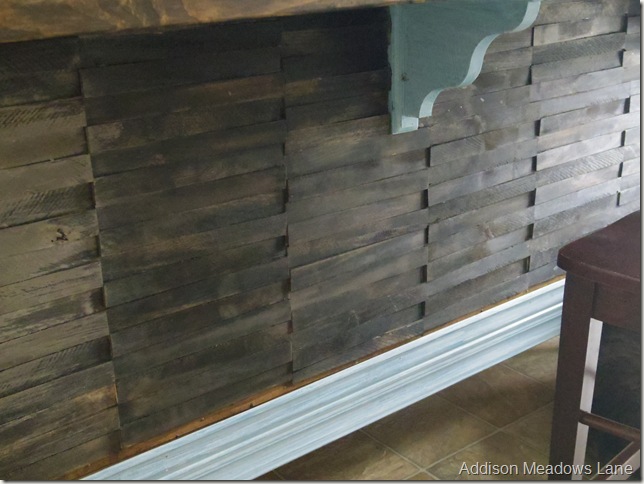
Shew, crisis averted! So now it was on to what the heck to do with the blank back side that just had that ugly thin MDF board on it. I thought about painting it but I knew It would just look like painted cardboard, so that option was out. Then I was looking through a Menards add and there they were, wood shims 2 packs for 5 bucks!! Say what??!!?? I know awesome! problem solved! So here’s how I did the back.
- I cleaned the back really well
- I used a caulk gun and liquid nails to attach the shims.
- Put a bead of glue on the surface you’re attaching them to and also some along the length of the shim.
- I placed mine skinny end to big end i think it’s the easiest way, also it gives a really cool detailed effect.
- After the glue dried( about a day) I stained them with Miniwax Jacobean
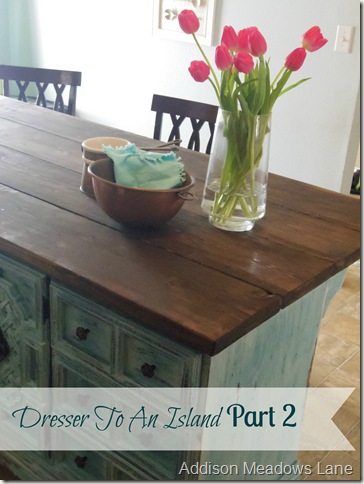
Below is the finished product. I love it a lot! It turned out so awesome!!
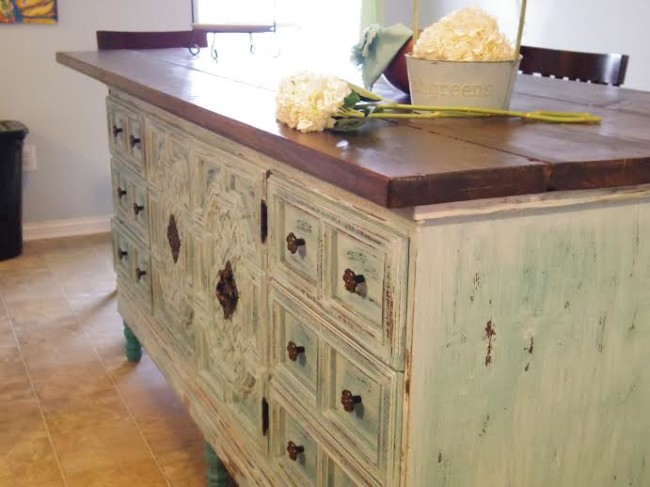
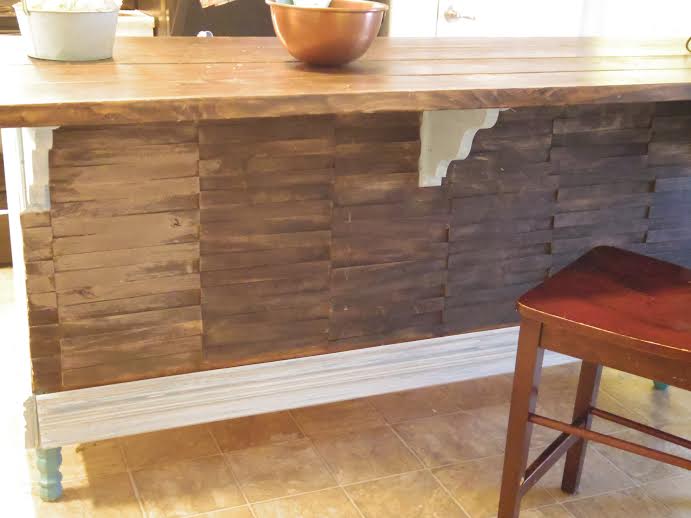
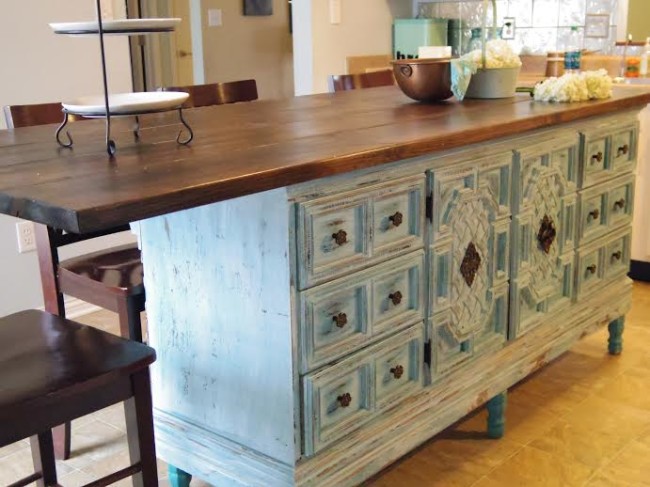 Isn’t she a beaut!! So the next time we talk I’ll be telling you guys how we did the top. It was so easy and super Cheap! Until then thanks so much for stopping by!

Link it Up:
Chic on a Shoe String Decorating
40 Comments on Turn A Dresser into A Kitchen Island The Chronicles Part 2.
3Pingbacks & Trackbacks on Turn A Dresser into A Kitchen Island The Chronicles Part 2.
-
[…] Coconut Banana Green Smoothie- Happily Ever After 2. Grain Free Graham Crackers- Worth Cooking 3. Dresser to Island- Addison Meadows Lane 4. Loaded Potato Focaccia- Anyonita Nibbles 5. DIY Yarn Eggs- One Little […]
-
[…] FINALLY finished our Kitchen Island. That thing seems like it took forever. It was difinitely worth it. It has drawn more traffic than […]
-
[…] Dresser to Island at Addison Meadows Lane / Living Room Makeover at Weekend Tweaks / Spring Home Tour at House by Hoff / Guest Bedroom Reveal at Chatfield Court […]



Allyson
03/28/2014 at 9:41 PM (11 years ago)This island looks amazing and is totally unique. The pictures really do not do it justice! I want one for my kitchen.
stacey
03/28/2014 at 9:47 PM (11 years ago)Thanks Allyson! You know we can do one for you, we just need a dresser!
Jeannine @ The Concrete Cottage
03/29/2014 at 6:13 AM (11 years ago)Fantastic! I was describing your awesome island to my hubby the other day, and told him “the back go it she added this wood to, it was angled, like shims or something.” I’m feeling so smart now that I had it figured out! LOL!! This is so, so awesome!
stacey
03/29/2014 at 12:08 PM (11 years ago)Jeannine, You crack me up! I’m so glad you like it. The Shims were super cheap and easy
I’ll be using them a lot more, I believe. Thanks so much for stopping by!
Emily Maldonado
03/30/2014 at 4:34 PM (11 years ago)This is fantastic!! I love. Also, I just bought a bunch of shims that I planned to make into some sort of art piece. I like how you laid yours, it’s given me a great idea!
Carmody
03/31/2014 at 12:48 AM (11 years ago)This island looks great and I love the shims.
Titia
04/01/2014 at 11:08 AM (11 years ago)I just finished an island conversion as well. I love what you did and your painting is amazing…Love it 🙂
*** Service disabled. Check account status. Antispam service cleantalk.org. ***
stacey
04/01/2014 at 11:46 AM (11 years ago)Thank You! Your island turned out fantstic aswell! New follower here for sure.
Sheila
04/01/2014 at 1:29 PM (11 years ago)What a fantastic project !!! Love what you’ve done.
Sheila
Marty@A Stroll Thru Life
04/01/2014 at 3:03 PM (11 years ago)I love this idea. Such great storage and what a fabulous big island. Thanks tons for linking to Inspire Me. Hugs, Marty
stacey
04/01/2014 at 3:32 PM (11 years ago)Thank you so much for taking the time to come by,and also for leaving such a nice comment!
Marie@The Interior Frugalista
04/02/2014 at 4:29 PM (11 years ago)Oh wow I am loving the transformation you gave this dresser – such a unique island! So glad you linked it up at the DIY Sunday Showcase Party. I have added it to our DIY Sunday Showcase Talent Board on Pinterest.
stacey
04/03/2014 at 8:26 AM (11 years ago)Awesome! Thank you so much for stopping by.
Breanna
04/02/2014 at 5:40 PM (11 years ago)Gorgeous! I’m in love with the back. Such a great idea. Way to stick with it and come up with a solution for your paint color!
stacey
04/03/2014 at 8:25 AM (11 years ago)Thank you for the encouragement. It was definitely touch and go there for a minute. Ha ha.
Heidi
04/02/2014 at 6:30 PM (11 years ago)Beautiful distressed wood! Love how large it is.
Katie Goldsworthy
04/02/2014 at 7:28 PM (11 years ago)The island turned out unique and beautiful! I love it! Pinning to the Monday Funday board!
Megin
04/03/2014 at 3:36 PM (11 years ago)This is so beautiful! I love the character of the piece and the blue is to swoon for.
Thank you for sharing this at DIY Showcase on VMG206.
~ Megin of VMG206
stacey
04/04/2014 at 12:11 PM (11 years ago)I’m so glad you Like it! That blue color Did turn out wonderful, but it was a rough road getting there. LOL! Thanks so much for stopping by!
Nicki
04/06/2014 at 2:15 PM (11 years ago)That looks amazing! Great job!
Kim
04/07/2014 at 8:18 PM (11 years ago)Wow, I love it. Beautiful color and rustic!
*** Service disabled. Check account status. Antispam service cleantalk.org. ***
Marie
04/08/2014 at 10:51 PM (11 years ago)Can I just say amazing? I really love what you have done with this. It really is perfect and I love the look of it. Thanks for linking up at Sunday Soiree!
stacey
04/08/2014 at 11:13 PM (11 years ago)Oh thank you! I’m so glad you took the time to come by and comment, that means a lot to me. I love your blog. I’m so glad you like it!
Suzan
04/09/2014 at 12:24 AM (11 years ago)Just gorgeous – the color is beautiful and I LOVE how the island extends past the dresser – what an incredible makeover!
Thanks for sharing ( visiting from Savvy Southern Style )
*** Service disabled. Check account status. Antispam service cleantalk.org. ***
Mindi
04/09/2014 at 4:53 AM (11 years ago)It is stunning!! I love it, so creative to turn a dresser into an island! You pulled it off great! I love the top and the finish!
Nancy
04/09/2014 at 2:28 PM (11 years ago)Aren’t you super clever!!
Love the idea of the dresser turned island….but then the shims for the backing! Wow.
that is the best!
Nancy
wildoakdesigns.blogspot.com
Princess Pindy
04/09/2014 at 11:50 PM (11 years ago)Great Job!!! I have been that woman curled up in the fetal position, rocking and crying!! It is good to know I am not alone, lol. It is beautiful. I just keep telling myself the worst that can happen is I have to paint it again……
Scribbler
04/11/2014 at 12:45 AM (11 years ago)Seriously clever! If I ever get my beach cottage, I am going to do this!
Paula
04/17/2014 at 2:12 PM (11 years ago)Amazing! Can’t wait to see how you did the top!
stacey
04/17/2014 at 2:55 PM (11 years ago)Thank you so much! The tutorial for the top is coming very soon.
Clever Blonde - Donna G
05/03/2014 at 7:19 PM (11 years ago)I love it too. You are very clever. I have done a lot of furniture restoration over 30 yrs and this is really amazing.
stacey
05/06/2014 at 1:47 AM (11 years ago)Such an encouraging comment. Thank you so much!
Stephanie
06/04/2015 at 9:51 AM (10 years ago)YOU ARE AMAZING!
stacey
06/04/2015 at 10:01 AM (10 years ago)Thanks Steph! You aren’t so bad yourself. 😉
Sheila White
02/02/2016 at 4:45 PM (9 years ago)I have the exact dresser or very close and I planned to do the same thing with mine when we move. Thanks for all the details and I will be following close to see how you did the top. I have found 4 chairs on the road that surprisingly are in good shape and the right height. What did you do for seats?
camille
12/10/2016 at 7:31 PM (8 years ago)how long was this dresser to start with and then how big did you make your top?
melanie arthur
07/16/2018 at 12:07 AM (7 years ago)What did you do in order to attach the countertop to the dresser?