Ok. So, of course just like every other woman in the world I wanted butcher block countertops On my Dresser Turned Island. With my budget though, this Wasn’t possible. So I did what any other sane person would do. I got on Pinterest. LOL! Luckily I actually found a tutorial that was quite useful. Loraine over @ Breakfast 4 Dinner had exactly what I was looking for cheap,beautiful, and do-able. I used this tutorial as a guide for ours. I originally had planned on making the top look like butcher block but once we got it together I liked the planked look.
*** This post contains affiliate links for your convenience***
Supplies:
- 4- 2”x10”x10’ wood planks (This may be more or less depending on what piece of furniture you’re using.)
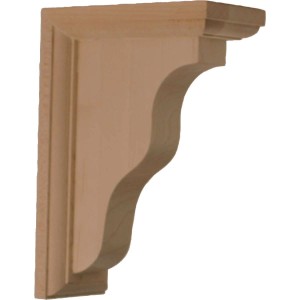
- Three corbels:
3. Caulk gun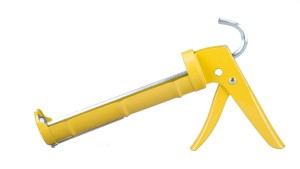
4. A tube of construction adhesive 
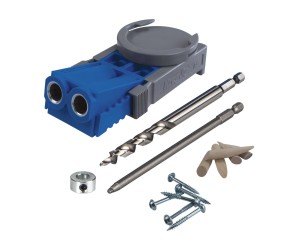
5. A Kreg Jig. Also be sure to buy a couple extra pakages of the 2” screws for it. The set doesn’t come with nearly enough.This is the one we used:
6.1 1/2” Screws (for attaching the top to your dresser and corbels)
* Please note the measurement of these screws may be different for you, depending on the thickness of the top of your dresser.
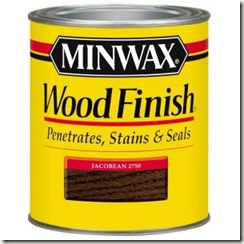
7. Stain in the color of your choice
8. Polyurethane
So here’s the how to of it all:
- Measure depth of the dresser.(depth to me is from the side with the drawers to the back of the dresser that would sit against the wall) Then measure the length of the corbels you plan on using. Ours came out to 36” (that’s the dresser depth plus the length of the corbel. Then you need to measure the length of the dresser and decide how long you want your counter top to be. We decided on 8ft. that left enough overhang on the end for 2 more seats
- Since our measurement came out to 36” that meant we needed 4 2”x10” So it was off to home depot we went.I cannot stress to you enough how important it is to get the straightest pieces of wood you can find. Believe me, it will make your life so much easier. We had the entire pile un-stacked by the time we decided on the 4 we wanted. The Home depot employees thought we were insane!
- Attach all your corbels to the back side of your dresser. (we hung our corbels upside down to give a bit more support to the countertop)

- After those were hung we laid our 2X10s down on the top and glued in between them with the construction adhesive (Be sure to wipe off any excess on the side of the wood that will be showing, or your stain won’t adhere right) after aplying the glue we used a large pipe clamp and clamped them together to dry.

- When the glue was dry we cut the boards down to the length we wanted, while they were clamped.
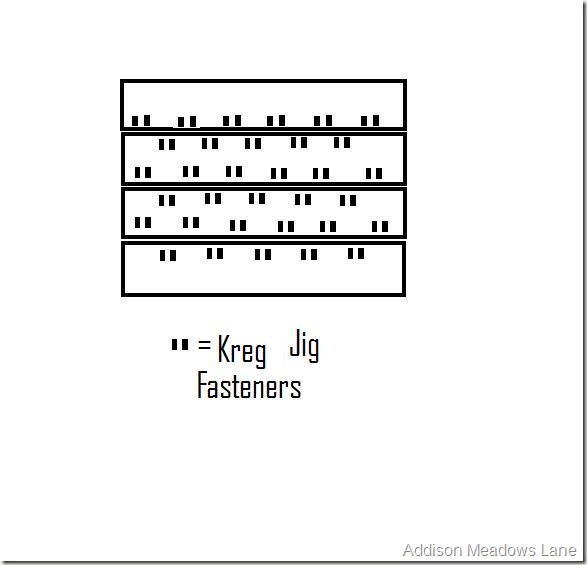
- After the boards were clamped and we dry fit the top, to get a feel of what it would look like, we attached the boards together with the Kreg Jig. You guys, I totally thought I took pictures of this part. But I guess I didn’t (sorry) So instead here’s a sweet little drawing on how and where we placed the screws to attach the boards. This would be looking at the underside of your counter top.
- After the boards are attached they may be a bit bowed. Don’t you worry your sweet little face. If this is the case just get 2 giant beach towels, or many small towels. Get them damp and lay them on top until the wood gets level again. This usually takes about 24 hours.
- Once your boards are even again put some construction adhesive on the bottom side . Then using your 1 1/2 screws attach your top. We screwed directly through the top of the dresser into the underside of the counter top. We did the same thing on the corbels.
- Next it’s time to stain! I used the same color on the Counter that I used on the
- Wood Shims on the back of the dresser.
- After that it’s time for the polyurethane. I did 4 coats. You can do more or less it’s all up to you. I just wanted to make sure that no water got on my stain, and also to keep food and funk out of the cracks between the planks.
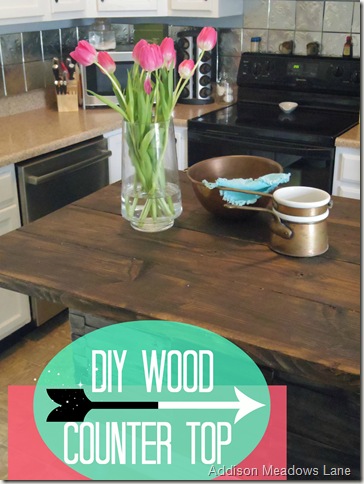
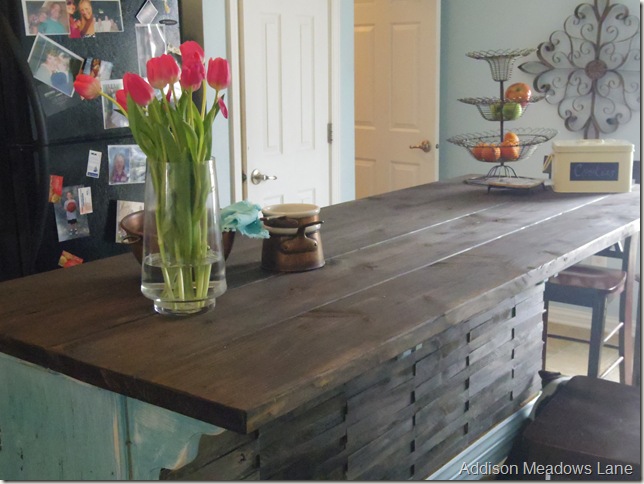
Here is the end result
Oh I just Love It! This Island has turned out so much cooler than I ever thought. It’s pretty much taken on a life of it’s own haha. So I guess this concludes the Dresser to an Island Chronicles. On to the next project.
Thanks For stopping by!
-Stacey
Link it Up:
13 Comments on DIY Wood Countertop. Dresser to a Kitchen Island the Chronicles: Part 3
2Pingbacks & Trackbacks on DIY Wood Countertop. Dresser to a Kitchen Island the Chronicles: Part 3
-
[…] I always use a waterbased polyurethane. Depending on the use Like say my DIY Countertops […]
-
[…] deck Source Favorite dining room Source Favorite DIY Project- Dresser to an island Source Favorite house. I have been doing a lot of dreaming about a farmhouse lately! Source […]


Katie @ Upcycled Treasures
04/22/2014 at 1:21 PM (11 years ago)I LOVE this, wow what a genius idea and it looks so pretty and earthy, and like it has been there for years. Pinned 🙂 Thanks for sharing at The Makers!
stacey
04/25/2014 at 12:58 PM (11 years ago)Thank You so much Katie! I’m so glad you like it. It turned out so much better than I thought.
Corey @ TinySidekick
04/23/2014 at 2:18 AM (11 years ago)Wow! This is so cool. I love that this was a dresser. Such an awesome idea and the top and shim side looks so good. Thank you for linking up at The Makers! We are so glad to have you 🙂
stacey
04/25/2014 at 1:00 PM (11 years ago)Thanks Corey. The shims are probably my favorite part, they give it so much character.
Heather
04/25/2014 at 11:54 AM (11 years ago)Great job! The best projects are the ones that are affordable and still look amazing!
ananda
04/25/2014 at 2:32 PM (11 years ago)such a wonderful tutorial stacey! it looks gorgeous! i just bought a kregg jig and cann’t wait to use it! =)
stacey
04/25/2014 at 6:59 PM (11 years ago)Thank YOU!! The Kregg Jig is currently my absolute most favorite tool! It’s so easy too. You’ll definitely be so happy you purchased one.
Andrea Fogleman
04/26/2014 at 9:10 AM (11 years ago)What a fabulous island and repurposed piece. I love the color and how you made your own counter top.
stacey
05/06/2014 at 1:46 AM (11 years ago)Thank you so much! It’s so functional and has added so much character to my kitchen.
Mary
02/25/2016 at 12:27 PM (9 years ago)How did you attach the corbels my dresser is the same and there is only a thin piece of backing on it.
stacey
02/25/2016 at 1:58 PM (9 years ago)HI Mary! We Were lucky enough that the edges of the dresser were thick enough for us to drill into. We also drilled the top screws of the corbels at an angle through the top of the dresser. The bottom screws on the middle corbel were secured to a 6 inch piece of 2×4 we put on the inside of the dresser. I hope that helps.