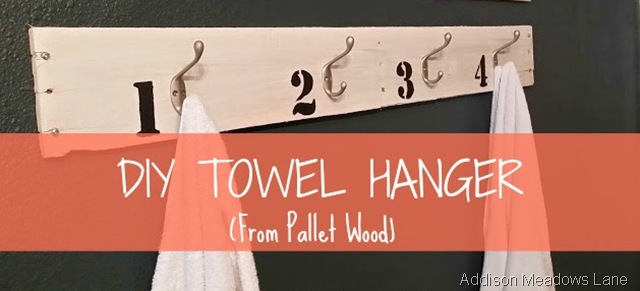
I am so in love with the way this turned out. Please excuse the not so awesome pictures. My master bath has ZERO natural light. I know don’t even get me started on that. This project was quite honestly one of the easiest ones I’ve done. In fact it was so easy I didn’t even take pictures of the process. LOL I’m so bad about doing that! Well hopefully I can get you through this without them.
**** This post contains affiliate links for your convenience. You can see my full disclosure policy HERE****
What you’ll Need:
- A scrap piece of wood, it can be any wood of your choice. I happened to have like 8 pallets to chose from so it kind of worked out for me. HA!
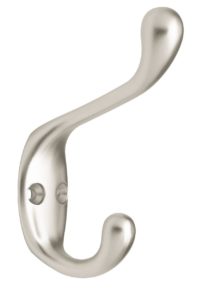
- Hooks for the towels to hang on. These are the ones I used:
3. For the Numbers I just found a font I liked in word and printed them off on normal paper. I then cut the numbers out with an exacto knife.
4. Paint of your choice. I used a white wash that was 70% paint and 30% water. I like using a wash because it lets all the little imperfections of the wood show through. For the numbers I used black poster board paint.
5. Dry wall hangers. I used These
: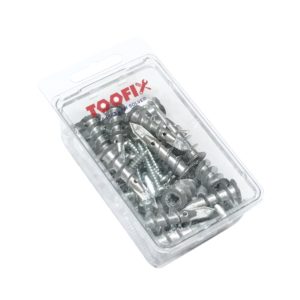 Screws that came with the anchors fit perfectly in the old nail holes that were already on the pallet plank.
6. Polyurethane I highly recommend polying this because there is so much moisture in most bathrooms.
So after you gather all your supplies it’s time to assemble.
- We removed the board from the pallet and I lightly sanded it just to get the stray wood burs off.
- I then painted it with the white wash and let it dry over night.
- Next came the “stencil” part. I’m way to cheap to buy real stencils so I usually just print them on plain paper and carefully paint over what I cut out. I’ve yet to have an issue with this method. You can do whatever you want here weather it be numbers, names, or initials, the list goes on and on.
- After that paint dried I put a coat of polyurethane on it.
- When the poly was dry I laid my hooks out, measured, and marked where they were going. The hooks came with hardware to fasten them so I used that. The screws were a little long so I had to take a hammer when I was finished and hammer the tips over to make the back flat.
- last but not least it was time to hang it. This is where the Beard came in, he just read the directions on the drywall hangers and went from there.
So there you have it the instructions on the worlds easiest towel hanger.
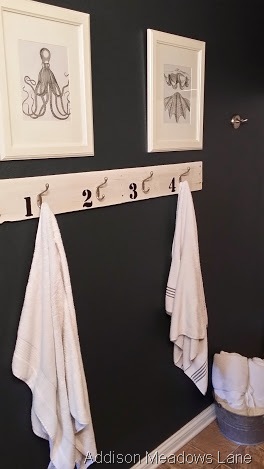
Now you all know I couldn’t just let the towel hanger be up there all by itself so I went over to The Graphics Fairy (her site is unreal and I love that she offers everything free)and downloaded a vintage Octopus and a vintage Clam. That I framed and hung above it. They really completed the look.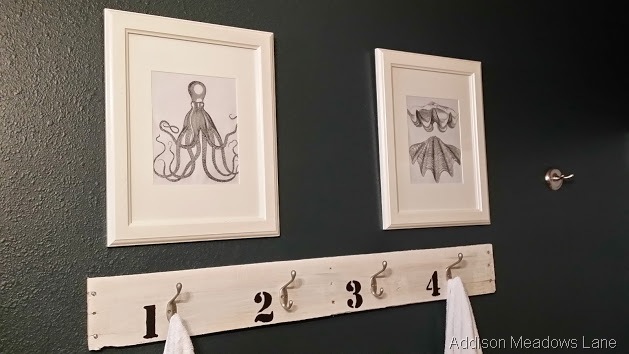
I know right??!!?? Too Cute! And now for a full shot.
Not to toot my horn but when the Beard says “That looks really good.” without being prompted, I know it’s pretty great LOL.
Hope you guys enjoy it as much as I do.
Thanks for stopping by.

13 Comments on DIY Towel Hanger From Pallet Wood
2Pingbacks & Trackbacks on DIY Towel Hanger From Pallet Wood
-
[…] then got a piece of pallet wood I had Left from My DIY Towel Hanger and marked it to make inserts for the caddy. ( I marked them a little longer so they would be snug […]
-
[…] DIY Towel Rack from Addison Meadows Lane […]

Sarah @ Little Red Brick House
07/17/2014 at 8:43 PM (10 years ago)Stacey, that is so cute! I love that you numbered the hooks. And the prints perfectly tie the space together! Love it!
stacey
07/25/2014 at 4:31 PM (10 years ago)Thank You so Much Sarah! The numbers made it complete for sure, I hung it up without them and it looked so plain!
Leigh Anne
07/17/2014 at 8:49 PM (10 years ago)Love it! So cute! I’m too cheap to buy stencils too. I love your wall color, black & white, a girl after my own heart 🙂
stacey
07/25/2014 at 4:27 PM (10 years ago)Thanks Leigh Anne! My wall color is actually Navy Blue But with the horrible lighting in there it’s hard to tell. I think the Beard’s next project will be a bathroom window. 🙂
Alexis @ Persia Lou
07/23/2014 at 5:39 AM (10 years ago)Looks great! I love the prints above too. 🙂
stacey
07/25/2014 at 4:25 PM (10 years ago)Thanks so Much Alexis! I love the prints too, and the fact they were free makes them even more attractive. 🙂
jessica
08/17/2014 at 5:41 PM (10 years ago)that turned out so darn good!!!! I might just have to try it out in my home! Pinning for later! thanks for sharing at the sparkles of inspiration party!
Sarah
10/02/2014 at 5:49 PM (10 years ago)This is cute, I love the numbers.
stacey
10/08/2014 at 1:33 PM (10 years ago)Thank you so much Sarah!
Bec @ Love That Party
07/27/2016 at 8:49 PM (8 years ago)I love this. I have been planning to make a rack like this for a while and never got around to putting it together. this is the inspiration i needed. Great post, thanks!
Kind regards,
Bec
stacey
07/28/2016 at 4:30 AM (8 years ago)So glad you like it, thank you for stopping by!