We were given a really awesome opportunity by Nautica at Home Interior Paint to makeover our living room color and style, so we decided to take advantage of that and add The DIY fireplace we’ve always wanted. I can not express how much I love this fireplace. It turned out better than I could ever have imagined.Lets get started
Here’s the room and wall before.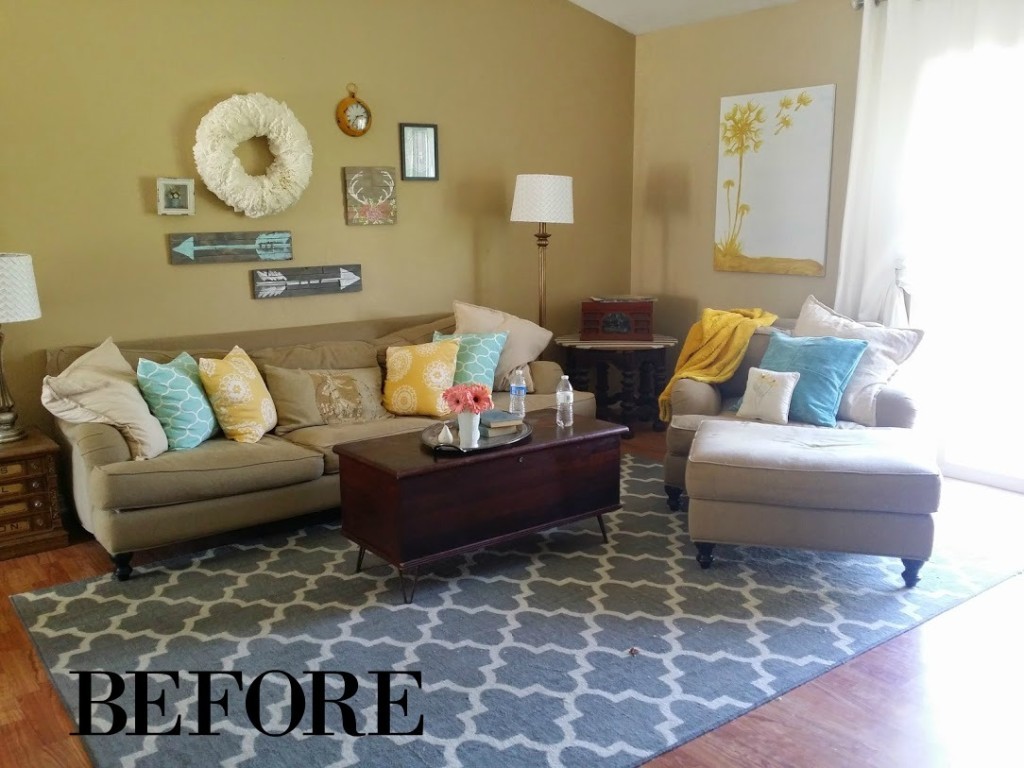
Not terrible it’s just not what I wanted. So we got to work planning.
We quite literally started with just a drawing and went from there. this is the original drawing.
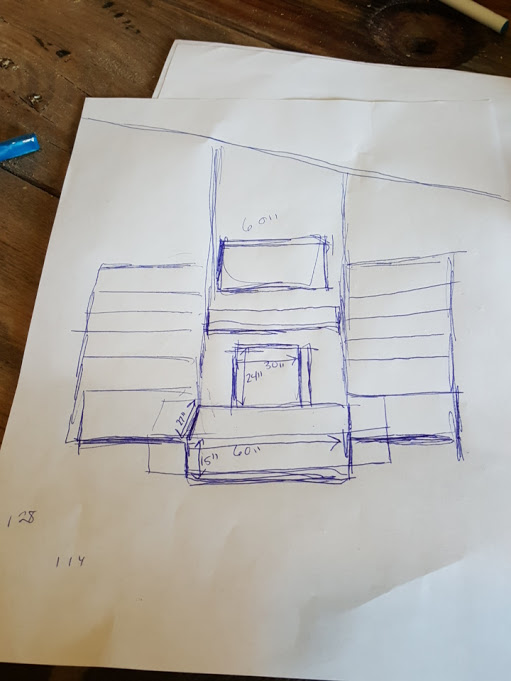
After I got down on paper what I wanted The Beard and His best friend Craig took it from there.
** This post contains affiliate links. That just means if you click on a link and make a purchase I may receive some compensation. You can read my full disclosure HERE***
Here’s what you’ll need to construct and attach the frame to the wall.
-These materials will vary depending on the size of fireplace you decide to build.
- 4 L brackets for the mantle
- 6 Pallets
- 10- 2x4x8s
- 3 sheets of 1/2″ 4×8 plywood
- 1 5lb Box of 3 in wood screws
- 1 5lb Box of 2.5 in wood screws
- 10 Heavy duty Drywall Anchors
- Fireplace Insert
Tools you’ll need:
- Ryobi Air Strike You guys….this thing is quite honestly a game changer. It saved us so much time and effort. I recommend using a nailer for your pallet wood instead of screws. It keeps the pallet wood from splitting and driving you insane. it also makes it possible to put multiple nails in without worrying about aesthetics. I cannot praise this tool enough.
- Miter Saw This saw isn’t Absolutely necessary it’s just much easier to cut the 2×4’s with. You can use your circular saw in place of this.
- Circular saw We use This one
- Kregg Jig Rip cut guide. This thing is amazing! It completely eliminates the need for a table saw. We use it all the time
- Impact Driver and Drill We use THESE
- Tape measure
- Drill Bits This is the set we have-
- You’ll need a 1/2 ” Drill bit for your drywall anchors.
- Misc Bits for screws This is the set we have.
- Hammer
- Pliers
- Screwdriver
We had all of these tools on hand already which made this project much easier. So after 3 trips to the hardware store to get all of the other supplies it was time to start. They started with building the Base. Which is also the hearth. It’s 60″Wx27″Dx15″H
We measured the wall from both ends of the room to make sure it was centered then attached the Hearth using The Heavy duty Drywall anchors.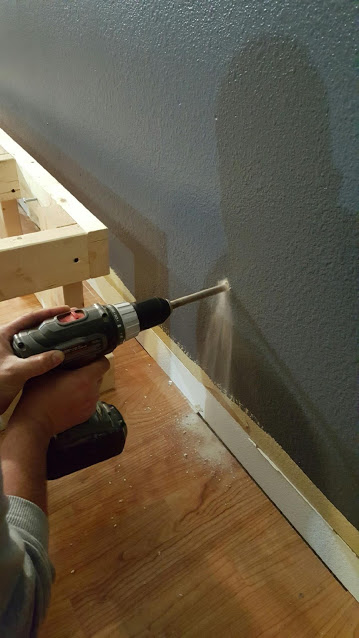
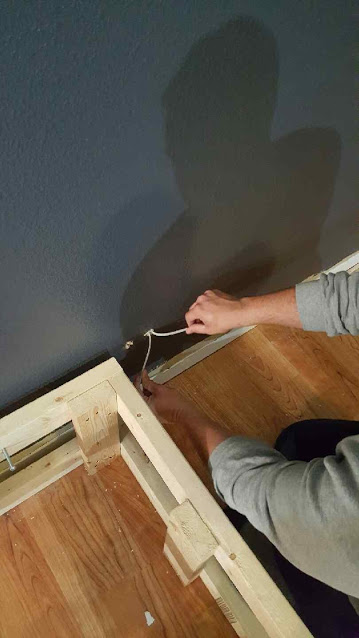
After the Hearth box was secured to the wall with 4 anchors They measured from the hearth to the ceiling in order to determine the heights of the 2×4’s that would make up the main section of the fireplace.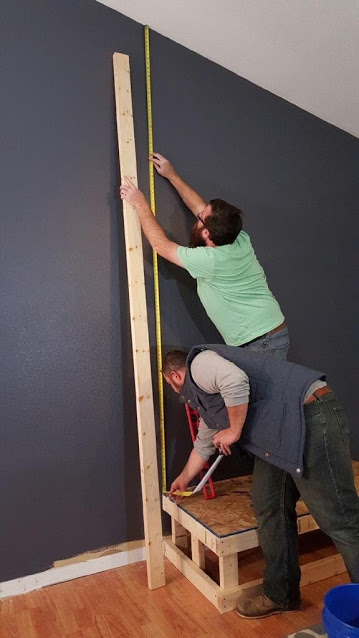
After they got the measurements and everything was cut to size they assembled it. Sorry about the Craptastic Lighting on these we’re in Indiana and it gets dark at 3PM LOL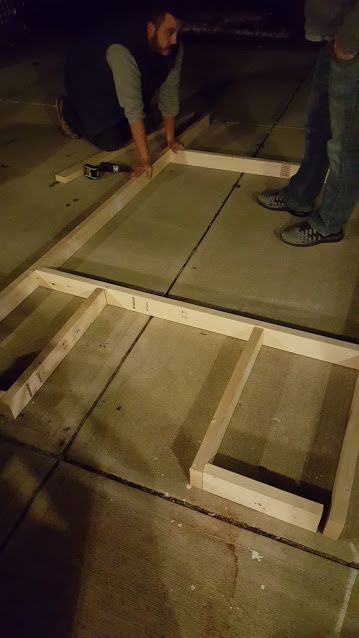
The frame included a box for the heater/fireplace and a box for our components.Once they assembled it in the driveway they then attached it to the hearth with the 3 in wood screws and to the wall with the drywall anchors.
Once the main frame was up they framed in the component box and added studs to the middle so we could hang the TV.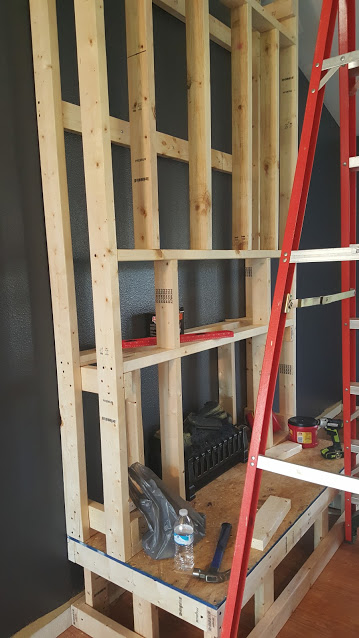
Next it was time to wrap it with plywood. They just held the pieces up scored them with a pencil and ripped them down with a circular saw. They covered the sides, the front, and the hearth; Attaching the plywood with wood screws where there were studs. At this stage we also drilled the holes for the Fireplace insert and Mounted the TV where we wanted it.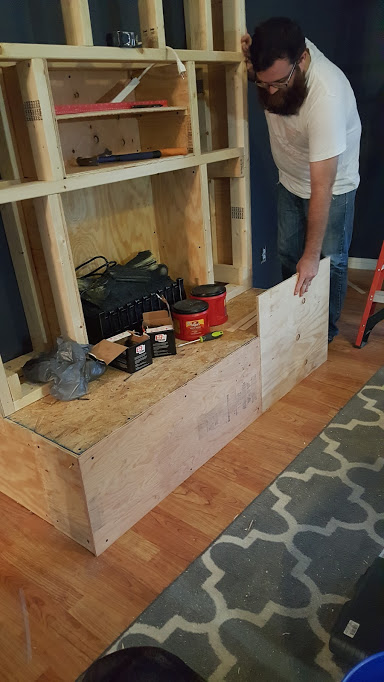


Now that the plywood is done and I painted the firebox black.Time to put the L brackets on for the mantle, then attach the pallet wood.We mounted and leveled them first so they’d be covered by the pallet wood. The mantle is a gorgeous piece of maple A dear friend, Ms. Marsha, gave me. We had to pre-drill the holes(maple is a very hard wood) then used 2 inch screws to attach it. Next we were on to the pallet wood. *****We also Built our custom built-ins at this stage. You can see that tutorial HERE*******.
If you’re worried about the plywood showing through the cracks of your pallet wood you can paint the plywood black or brown. I wasn’t really worried about it. There was no rhyme or reason to the way we attached the pallet wood. We just made sure none of the seams matched up kind of like a brick pattern. They started with the hearth and used the same method of holding it on there, scoring what line to cut, then attaching each piece with the Ryobi Air Strike. 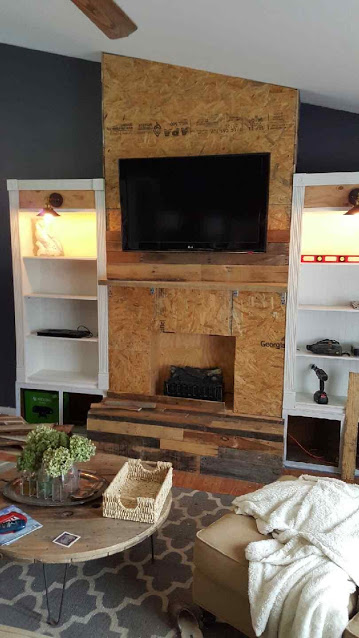 It was all kind of like a jigsaw puzzle trying to figure out what colors,sizes,and grains went where. We took the Pallet wood all the way tot the ceiling to make it look like it was a real chimney that goes through the roof.

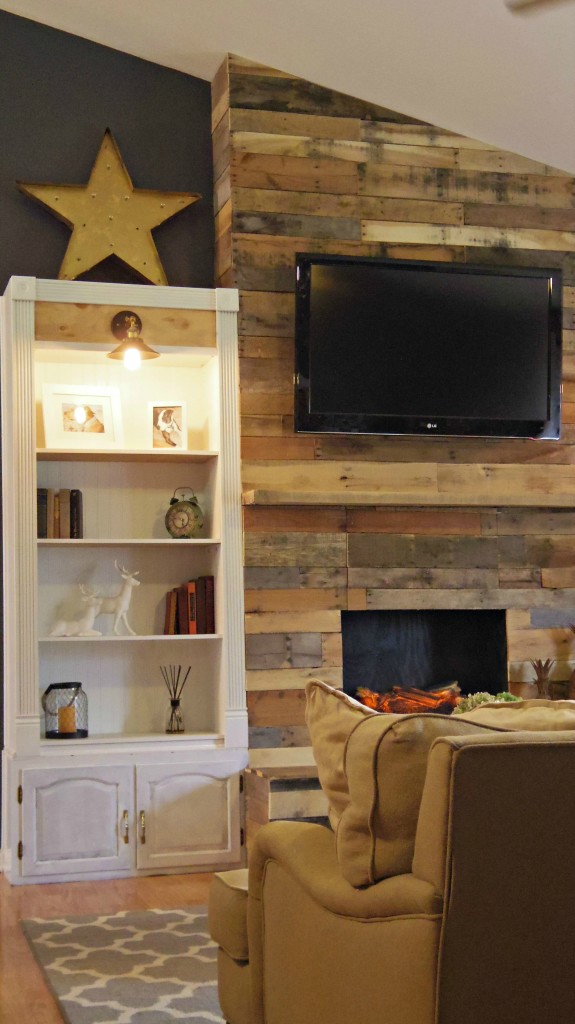


Gorgeous right? I really honestly still can’t believe this is in my house. I’m amazed by it everytime I walk out of my bedroom LOL. It’s just exactly what I wanted.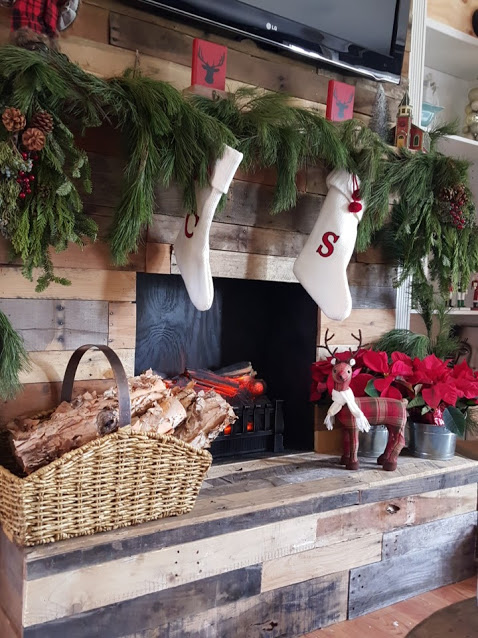
Here it is all decked out for Christmas. SWOOON! Be sure to check out how we did our Custom Built-ins HERE. Thanks so much for stopping by. I’ll be Linking up HEREandHERE
28 Comments on Diy Pallet Wood Fireplace
2Pingbacks & Trackbacks on Diy Pallet Wood Fireplace
-
[…] Addison Meadows Lane blogger Stacey built a fireplace from scratch. Her project is featured as a top 10 finalist in the DIY renovation contest on notjustahousewife.net. Image: http://addisonmeadowslane.com/ […]
-
[…] Secondly, you’ll need to think about the style of fireplace you want to construct. Stacey of Addison Meadows Lane chose to frame the fireplace with a dramatic floor-to-ceiling covering that attached to shelving […]

Sarah @ Little Red Brick House
12/14/2015 at 9:41 PM (9 years ago)Stacey, I am SO in love with your fireplace! It is absolutely stunning! I love the different colors and grains of the pallet wood planks. And it looks so beautiful decorated for Christmas. You guys should be so, so proud! I can’t wait to read all about the shelves because those look phenomenal too!
stacey
12/15/2015 at 10:29 AM (9 years ago)Thank you Sarah! We are pretty proud, and super amazed we made it through it in one piece. HaHaHa.
Kristi
12/15/2015 at 8:44 AM (9 years ago)Oh my goodness!!! I’ve seen the pics on Instagram, but it’s even better than I’d imagined Stacey! This might just be the most dreamy fireplace I’ve ever seen! Look how perfectly rustic it looks all dressed up for Christmas! LOVE, LOVE, LOVE how this turned out my friend!!!
stacey
12/15/2015 at 10:25 AM (9 years ago)OH man, Thank you so much Kristi! You are so kind. I really still can’t believe it’s my house lol. It’s going to take some getting used to.
Marie
12/16/2015 at 7:39 AM (9 years ago)Wow! That is so awesome! Love it! I love the TV up there but was wondering where you have put your TV components. Where’d ya hide ’em? 😁 🙂
Katie
12/16/2015 at 2:41 PM (9 years ago)LOVE!!! Can you please tell more about the actual fireplace. Where is it from? Brand? Thanks!!
stacey
12/28/2015 at 8:03 AM (9 years ago)Hi Katie! There’s a link to where I got the insert in the begining of the post.
the cape on the corner
12/18/2015 at 1:43 PM (9 years ago)that whole built in. like whoa, that is all amazing and fabulous! enjoy it!
b
stacey
12/28/2015 at 8:02 AM (9 years ago)Thank you so much! It has totally changed our space and I love it.
Suzy @ Worthing Court
12/27/2015 at 7:05 PM (9 years ago)Wow! I love this idea and result is great! I’ll be featuring your project at The Scoop this Monday night. Thank you for linking up!
stacey
12/28/2015 at 8:01 AM (9 years ago)So glad you like it Suzy, and thank you for the feature!
Gwen
01/05/2016 at 1:20 PM (9 years ago)HI Stacey! I just wanted to let you know that you are this week’s MEGA Rockstar from Creativity Unleashed! I will be shouting you out on all my social media outlets and will have tons of pins going up tonight on my biggest boards starting around 7:30EST. I’ll also be featuring you in my weekly newsletter on Friday. I hope you get LOTS of love this week! You totally deserve it, girl!!!
stacey
01/05/2016 at 1:36 PM (9 years ago)Thank you so much Gwen! I’m so excited about this, and so appreciate you taking the time to comment. Have a fantastic day!
Carrie at Kenarry Ideas for the Home
01/05/2016 at 10:31 PM (9 years ago)Whoa! This is seriously amazing. I can’t believe you just created a fireplace where there wasn’t one before. It looks awesome. Way to go, S & C! **Fist bumps**
Shirley Wood
01/06/2016 at 10:46 AM (9 years ago)Stopping by from Pin Worthy Wednesday. LOVE your Pallet wood fireplace! The outcome is amazing.
stacey
01/08/2016 at 10:02 AM (9 years ago)Thank you so much Shirley!
Pam
01/09/2016 at 5:36 PM (9 years ago)L O V E this pallet project! I have some picket fence that I’ve been repurposing. Tried to talk the husband into doing a feature wall in the hallway, but no luck so far. Maybe this will convince him otherwise? Thanks for this beautiful inspiration!
stacey
01/12/2016 at 8:39 AM (9 years ago)Pam, you are so kind! It definitely took a lot of convincing and “You’ll get it when it’s done” to get The Beard on board. He’s happy that I talked him into it. LOL.
Stacy Risenmay
01/11/2016 at 3:33 PM (9 years ago)It looks like it has always been there! I love it 🙂 It made it into the top 10 projects. Congrats!
stacey
01/12/2016 at 8:35 AM (9 years ago)Thank you Stacy, I so appreciate you taking the time to comment! I’m so glad you like our Fireplace. Have a fantastic day!
Emily
07/27/2016 at 12:24 PM (9 years ago)Are any building plans with dimensions available?
stacey
07/28/2016 at 4:36 AM (9 years ago)I don’t have any real plans we just went off of my original drawing and used those measurements. I can absolutely make some and post them. I’ll send an email out when I update the post!
Trevor
09/09/2016 at 3:42 PM (9 years ago)My wife and I love this so we are going to give it a try. I was just wondering do you have any type of opening at the bottom to plug in all your components and fireplace or how did you handle that part. Thanks.
stacey
09/09/2016 at 5:04 PM (9 years ago)Hi Trevor! I actually have a post about that all ready to go it will go live in the morning. There’s a hidden compartment under the mantel and above the firebox.
Amanda
10/25/2016 at 10:56 PM (9 years ago)Hi Stacey!!!! Friday night my husband and I were looking at pallet wall ideas for behind our electric fireplace that we already owned. We didn’t love the fireplace and really wanted to spruce up that wall. I typed in something like “pallet wall behind electric fireplace” to get some ideas and saw your blog post. I immediately loved it. I was thrilled when I saw that you too had used an electric insert to create your fireplace, we were sold! We were at the lumber yard at 10am on Saturday. We kept our electric fireplace insert and ditched the old surrounding. One of the nice things about ours is that it has the metal screen, a light, a remote,etc. so we for sure wanted to be able to use it again and it fit perfectly into the design at 28″ wide. We finally finished our project up today and I am so in love with it. We can’t stop staring at it. I don’t have a blog that I can share from but it’s gorgeous. Due to our wall being short, we didn’t do the bookshelves but it is gorgeous just by itself. We decided against pallets due to time and availability in our area and instead had a neighbor mill us 3/4″x6″ fence panels in 6′ sections that we then cut down as needed. We stained them 5 different colors and left some natural too. All in all it was very easy to follow thanks to your pictures. I printed 14 pages out from your blog that we kept with us while working so we could look back for reference. Instead of the hidden compartment since we don’t have a dvd or dvr, we let the weight of our fireplace insert hold it in place, it’s not permanently attached. If needed, it can simply be slid out to access the cords inside there (tv, fireplace, and fire stick) I was trying to figure out how to show you without a blog link so hopefully this works!
https://postimg.org/image/68lwzws4z/
Shelbi Bellnap
11/18/2016 at 10:51 PM (9 years ago)Hi Stacey,
We absolutely love this! I was just curious when you mounted the TV did you mount it to the actually wall or the plywood?
Thank you for putting this up!