This is exactly why I don’t throw things away. These drawers came from the Buffet Turned TV Stand, and of course as we were cleaning out the garage the man part In all his glory kept saying “Just throw these away! You’re never gonna use just drawers!” Ha! I showed him. For those of you who don’t know, my Sister, Brother-In-Law, and Their 2 kids are staying with us temporarily. So I took it upon myself to make the coolest bedroom eva for my sweet nieces,who are 5 and 7. This is just the first of many posts about this room, I’m so excited!!! I know, I know, Get ON With IT!!!
+++This post contains affiliate links for your convenience. You can read all about my other policies HERE+++
What you will Need:
- The Drawers (obviously). They can be what ever style or kind you wish. You can Also do as many as you like.
- A Tape Measure
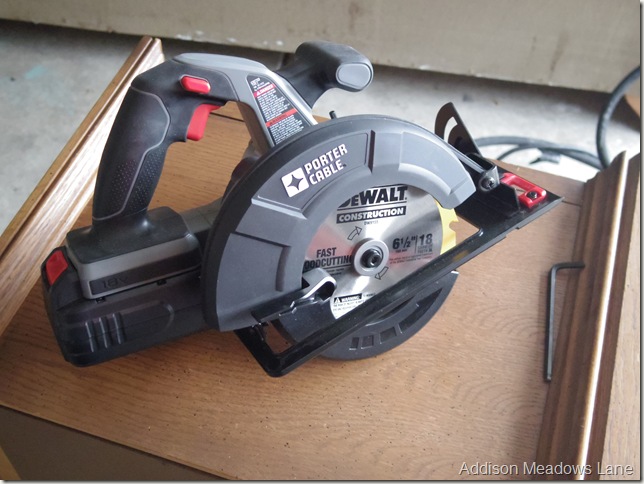
- A circular saw
- A level ( I suggest it be at least a 2ft level so it can span the width of the drawer)
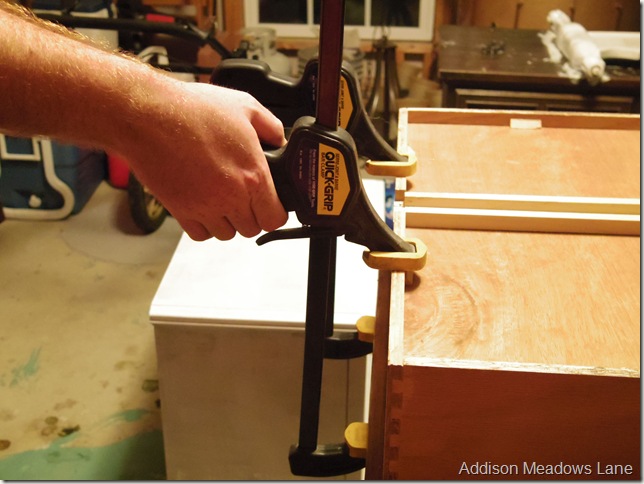
- Adjustable Clamps. We used these to hold the drawer in place, you may have a better set-up and not need them. Once again totally up to you.
- A screwdriver
- Oil based primer
- A foam Roller (for cabinets and doors)
- Spray Paint. I chose to use spray paint because it’s quick and easy, covers smoothly, and it was what I had on hand.
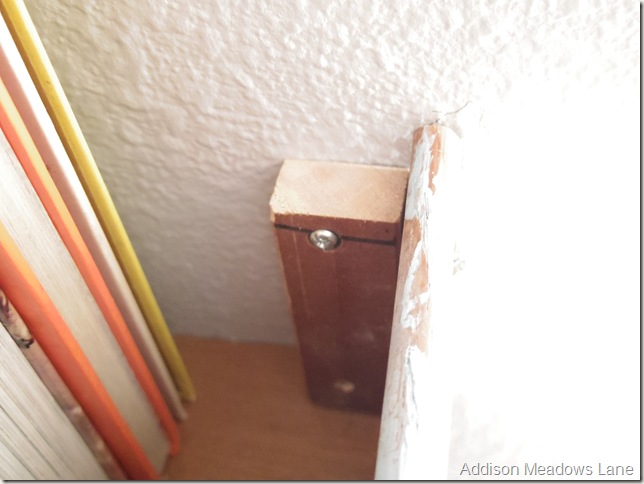
- A 3FT 1”x1” Piece of Wood. This will be cut down to Six – 5” pieces to make the cleats that hold the drawers to the wall. I cut mine to 5” Because height of my drawer was 6”, and I left a 1/2” gap on top and bottom to center it.
- A package of wood screws.(The size of the screw will totally depend on how big your drawer is, how thin the wood is, and what you plan on storing in your shelves).
- A Package of Drywall Anchors. I used 2 per cleat to be sure it would hold. Can’t be too safe.
Now the How-to Of it all:
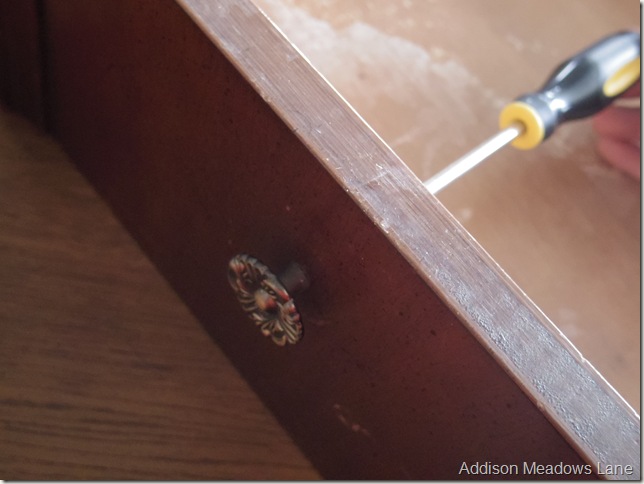
Remove all of your drawer hardware
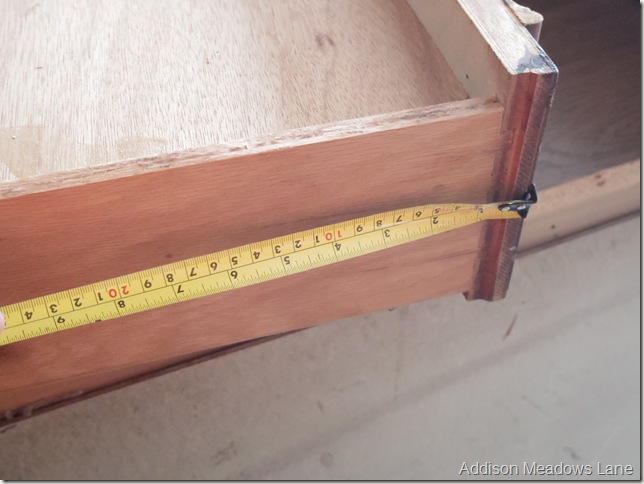
Measure from the front of the drawer back 6” on all the drawers.
Mark all the way across the bottom of the drawer, with a pencil or marker whatever is easiest for you to see.
Clamp the drawers down to be sure they don’t move while your cutting.
Take your circular saw and cut across the line you marked. (Sorry I didn’t get any action shots Just showing what a circular saw in fact is.)
Since you have your saw out it would also be an ideal time to cut your cleats to hang the drawers. This is not an exact science, everyone’s will be different. You’ll just have to measure the height of your drawers and plan your cleats accordingly.
Once you’ve cut your drawers it’s time to prime them.
I used an oil based primer so I wouldn’t have to sand them. Let your coat of primer cure overnight for it to be the most effective.
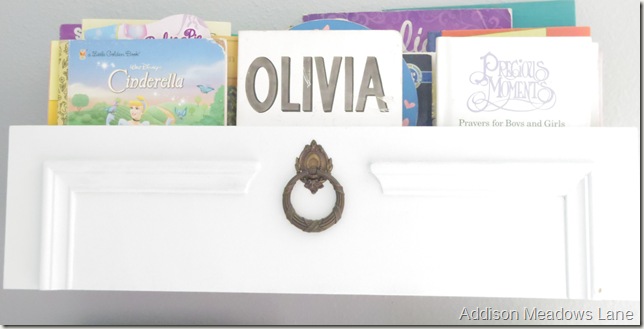
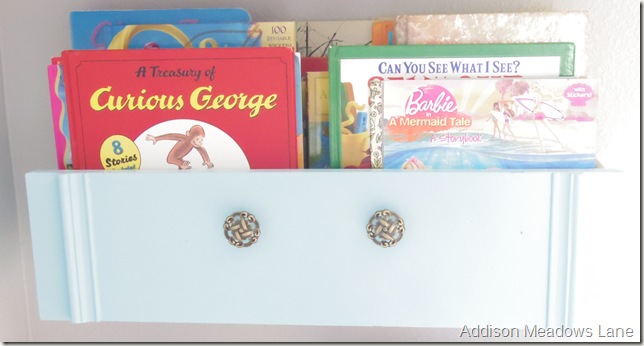
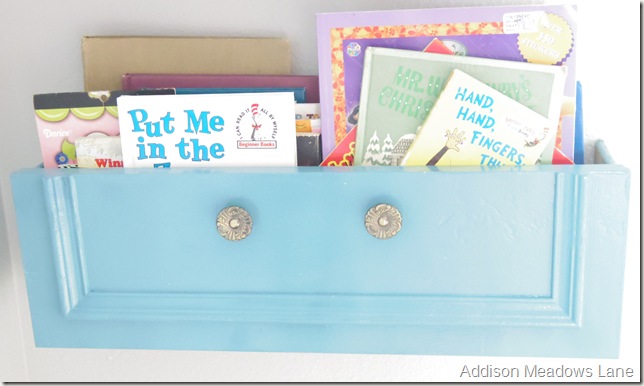
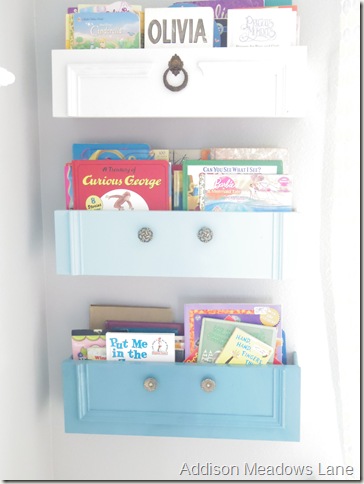
Now it’s time for the fun part! After your primer is dry it’s time to spray paint your drawers. I did mine in kind of an hombre color scheme.
The first drawer is Krylon Color Master Satin White
The second Drawer is Krylon Ocean Breeze
The third Drawer Color Is Valspar Mediterranean
After the drawers have dried re attach your hardware, and it’s time to hang them.
This isn’t very technical. I just held the first drawer where I thought I wanted it with a 2 ft level on top, then traced the inside of the drawer on the wall.
I then measured my mark and centered the cleat.
To hang the cleat I used the Drywall anchors.
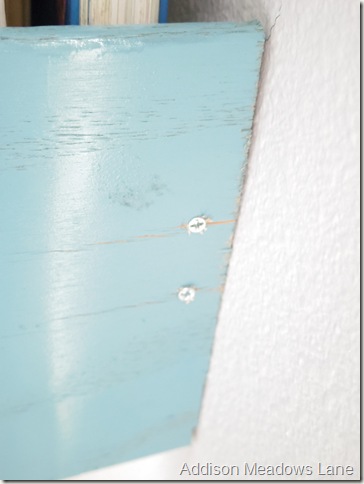
After the cleats were secure I held the drawer up again with the level on it and attached it to the cleats with the wood screws.
And that my friends is how you turn drawers into shelves!
Hope you got all you needed! Please if you have questions don’t hesitate to ask.
-Stacey
I’m Linking Up Here:
69 Comments on Make a Bookshelf From a Dresser Drawer
16Pingbacks & Trackbacks on Make a Bookshelf From a Dresser Drawer
-
[…] bookshelf from a drawer via addison meadows lane […]
-
[…] DIY Bookshelf from drawers by Addison Meadows Lane […]
-
[…] DIY Bookshelf from drawers by Addison Meadows Lane […]
-
[…] Addison Meadows Lane made a bookshelf from some random drawers. It’s a fantastic idea for a kid’s room or small home office. […]
-
[…] Fuller Be – Appliqued Onesie Tutorial 1. Anderson and Grant – DIY Framed Coarkboard 2. Addison Meadows Lane – Drawer to Bookshelf *** Remember to join “Give Me The Goods” on Monday! All the […]
-
[…] (source et détails) […]
-
[…] Addison Meadows Lane used old dresser drawers to create beautiful bookshelves […]
-
[…] Perhaps you don’t have the room for a bookshelf, but you can still organize books with this great alternative that hangs directly on the wall. Check out the details here. […]
-
[…] source […]
-
[…] drawers alone can be re-purposed into some awesome things too. This bookshelf Addison Meadows Lane made from Dresser drawers is so […]
-
[…] See? I told you I’d show you what to do with those leftover drawers. These make great bookcases hung up on the wall. Here are the directions. […]
-
[…] Tutorial Links […]
-
[…] Made of drawers. Genius. Addison Meadows Lane details exactly how to get these little gems made […]
-
[…] Perhaps you don’t have the room for a bookshelf, but you can still organize books with this great alternative that hangs directly on the wall. Check out the details here. […]
-
[…] Bildekilde og fremgangsmåte: Addison Meadows Lane […]
-
[…] Have an old desk and not sure what to do with it? It’s time to upcycle! Follow this blogger’s tutorial and make your very own DIY Drawer Bookshelf. […]


Suzy
05/30/2013 at 8:11 PM (12 years ago)I love your drawers turned book shelves! Very functional and great way to re-purpose those old drawers!
Amie
05/30/2013 at 9:41 PM (12 years ago)Wow, this is super creative! Looks great. I’m bookmarking this for the future!
Karen @ Karen's Soiree
05/31/2013 at 12:04 AM (12 years ago)This is awesome! Just pinned this from the Pin It Party! I think I might try this for my daughter’s room.
Karen
stacey
05/31/2013 at 4:57 PM (12 years ago)So glad you like them!! Lurv your page BTW. Thanks for taking the time to drop by!
ingrid@nowathomemom
05/31/2013 at 4:51 PM (12 years ago)I love what you did with the drawers; so pretty and functional! 🙂
Ingrid
Nicolette Roux @ Powerful Mothering
06/01/2013 at 1:01 AM (12 years ago)VERY awesome!! Pinned
Thank you for sharing & linking up at “Pin it” Tuesday!
PowerfulMothering.com
See you NEXT week!!
Kelly
06/01/2013 at 5:05 AM (12 years ago)You did such a great job! I love the hardware and the colors you chose to paint. I’m pinning it for future project on my to do list!
stacey
06/02/2013 at 9:08 PM (12 years ago)Thank you! So glad you like it.
anezinis
06/03/2013 at 12:03 PM (12 years ago)Very good idea!!!
Amanda Quam
06/03/2013 at 1:49 PM (12 years ago)This is AWESOME and so super creative. You are one sweet Aunt!
Selene Galindo
06/03/2013 at 4:58 PM (12 years ago)What an awesome idea this is! So unique, I’ve never seen this before…pinning! I love the colors you painted them too!!!
Restoration Beauty
Mary Beth @ Cupcakes and Crinoline
06/04/2013 at 3:04 AM (12 years ago)This is such a great idea! Love it! Thanks for sharing at Project Inspire{d} ~ pinning to my party board.
Hugs, Mary Beth
Lynda
06/04/2013 at 6:18 AM (12 years ago)Love Love this idea. I am so going to do this… great job.
Ef Zin Creations
06/04/2013 at 7:18 AM (12 years ago)Great idea! and the result is just adorable!
Zina
(New follower from Give Me The Goods Monday Link Party blog hop
efzin-creations.blogspot.com)
Amy @ Marvelous Mommy
06/04/2013 at 3:01 PM (12 years ago)This is such a great idea! Definitely pinning this for later!
stacey
06/04/2013 at 3:31 PM (12 years ago)Thank you! Definitely my favorite project to date.Thanks for taking the time to comment.
Sarah
06/04/2013 at 5:45 PM (12 years ago)What a cute idea, they look great. Thanks for sharing.
Sarah
Jennifer Lachman
06/04/2013 at 6:43 PM (12 years ago)This is a great idea. We are replacing my daughters dresser next week. Can’t wait to see my husbands face when I tell him we are not throwing out the drawers. I’m usually the one telling him to just throw things away.
stacey
06/04/2013 at 6:58 PM (12 years ago)Well if you do make your own be sure to post or link to them, I’d love to see how they turn out!! I’m sure his face will be pretty similar to the face I got! HAHAHA
Jackie Karlic
06/04/2013 at 10:01 PM (12 years ago)Hi! Found you on Pin It Tues. Love this! Very creative and looks gorgeous. Now following you on Bloglovin’
stacey
06/05/2013 at 11:53 AM (12 years ago)Awesome! Thanks for stopping by! Very much appreciate the lurv.
Debi and Charly @ Adorned From Above
06/05/2013 at 3:03 PM (12 years ago)This is so cute.
Debi
doreen
06/05/2013 at 11:36 PM (12 years ago)Your three book “shelves” are so ingenious and beautiful. Well done! Next time I transform a dresser or armoire into something else, I’m also going to keep the drawers. Now following you, and look forward to catching up on your posts. I blog at http://altered-artworks.blogspot.com and hope you’ll come by for a visit and say hello.
Doreen
Christy@Confessions of a Serial Do-it-Yourselfer
06/06/2013 at 1:49 AM (12 years ago)What a clever idea!! Isn’t that the best feeling when you come up with such an amazing idea all in your own??! I love that! These turned out really cute…I’m going back to pin now!:)
XO,
Christy
Christina @ I Gotta Create!
06/06/2013 at 10:55 AM (12 years ago)This is my FAVORITE link at last week’s party! You are a STAR over at I Gotta Create! Featuring your fabulous bookshelves. Thanks so much for linking up at the Wildly Original link party.
http://igottacreate.blogspot.com/2013/06/bed-bath-kitchen-ideas.html
<3 Christina @ I Gotta Create!
stacey
06/06/2013 at 11:47 AM (12 years ago)YESSS!!! I’m super stoked you liked it! Thank you so much for featuring me.
Recreateanddecorate
06/06/2013 at 10:57 AM (12 years ago)That’s a great Ida! So cute.
Autumn B
06/06/2013 at 6:55 PM (12 years ago)I love this idea!!! I may have to try it soon! Thanks for linking up at the Pin-it Proudly Link Party! I’m a new Pinterest and Facebook Follower!
I’m Co-Hosting the Link Party and would love to have you visit me as well at My Kind Of Introduction!
Jenna
06/07/2013 at 1:28 AM (12 years ago)SO clever and so, so, so cute! Love them! Thanks for linking up to Give Me the Goods Monday! Love having you party with us!! Jenna @ Rain on a Tin Roof
Miriam
06/09/2013 at 12:12 AM (12 years ago)These came out great!!!! New follower from Pin It Tuesday
stacey
06/09/2013 at 1:12 AM (12 years ago)Thank you!! I’m so glad you took time to stop by and comment!
rachel
06/09/2013 at 10:31 PM (12 years ago)what a cute and clever idea! 🙂
http://wildflowercreative.blogspot.com
Markell Corpus
06/10/2013 at 6:33 PM (12 years ago)Holy cow. This is so stinking cute. Thanks for linking up at the Pin It Proudly Link Party. I can’t wait to see what you link up this Thursday 🙂
Markell Corpus
06/13/2013 at 3:50 AM (12 years ago)Hey! Just wanted to stop by again and tell you that this is one of three posts that I featured on this weeks Pin It Proudly Link party! Head over and grab a feature button if you’d like to and link up your newest favorite pin. I can’t wait to see what you have this week!
Here is the link to the party: http://www.amouseinmykitchen.com/2013/06/pin-it-proudly-link-party-2.html
Andrea
06/28/2013 at 1:54 PM (12 years ago)That is brilliant! That’s it, just brilliant…
Now I am going to go hunt for old drawers!
stacey
06/28/2013 at 3:47 PM (12 years ago)THank yous so much!! I really appreciate the comment.
brooke
06/28/2013 at 2:39 PM (12 years ago)What a Fun Project, I have a few drawers in my garage that need a new home I think i know what to do with them now! I would love you to come link up at my Paint Party going on now
http://startathome.blogspot.com/2013/06/paint-party_26.html
Hope to see you soon,
brooke
stacey
06/28/2013 at 3:45 PM (12 years ago)Oh I lurv your site! New follower and i linked up, thanks so much for taking time to comment!
Therena
06/30/2013 at 6:28 AM (12 years ago)Oh my goodness!!! You are SO clever! I am in love with this! I’ll def be following along!
Stephanie Denton
11/27/2013 at 10:42 PM (11 years ago)These are so freakin’ CUTE!!! I absolutely love this idea that saves floor space a book shelf would take up. One question though. The “cleats”. I have no idea what those are and how you made them. Can you explain that part in more detail?
stacey
12/03/2013 at 3:31 PM (11 years ago)Hi Stephanie!,
Thanks for stopping by! The “cleats” are just 2 small pieces of wood that I cut to the height of the drawer. I fastened them to the wall with drywall anchors then attached the drawer to them using wood screws.
Paula@SweetPea
01/24/2014 at 10:54 PM (11 years ago)This is such a clever use of old drawers. Thanks so much for sharing your project with this week’s Throwback Thursday party.
*** Service disabled. Check account status. Request number d13aacdde213ba3fc8773258b53ad63a. Antispam service cleantalk.org. ***
Ashley@Biggerthanthethreeofus
03/21/2014 at 6:44 PM (11 years ago)This is so smart!
stacey
03/21/2014 at 7:25 PM (11 years ago)Thank you! They were pretty easy to do also.
Pili
10/18/2015 at 11:08 AM (9 years ago)Hi, Stacey! I made a round up about different uses for drawers, and your was so lovely I included it. I gave credit to you, as well as a link back to your site. Hope this is ok for you, you can check it here:
http://sweethings.net/15-different-uses-for-drawers/
Hugs,
Pili
David Rodriguez
04/19/2016 at 9:48 AM (9 years ago)Great ideal. Just in time. I have an old cabinet I was going to sell in the garage sale. Not Now. Thank You I will definitely use them for the book shelves.
stacey
04/19/2016 at 10:28 AM (9 years ago)Thank you David, so glad I could help you salvage that dresser. If you get them done shoot me an email with the photos so I can see !
Sharon
06/22/2016 at 10:37 AM (9 years ago)How much books can it hold ? And also how did you get them to stay like that ? I want to do it so bad
stacey
06/22/2016 at 11:18 AM (9 years ago)I’m not sure exactly how many books they can hold, but you can see by the photos it’s a good amount. We attached them by first cutting two wooden cleats per drawer then attaching them to the wall first. After that we held the drawers up then screwed the drawers into the cleats throught the side. There are photos above of this process.
Sharon
06/22/2016 at 2:39 PM (9 years ago)What are cleats ? I’m sorry I’ve never actually made that before .
stacey
06/22/2016 at 2:52 PM (9 years ago)They’re pieces of wood we cut to attach to the wall then attach the book shelf to. They’re pictured in the 10th picture down from the top.
ListsForAll.com
06/30/2016 at 4:11 PM (9 years ago)Really cool idea, great job!Just wanted to let you know that we included your shelving in our list of the Best Shelving Ideas http://www.listsforall.com/best-shelving-ideas/
Melissa
06/30/2018 at 8:34 AM (7 years ago)I’m confused as to how you cut this across with a circular saw. Any suggestions? Also what depth did you go with for these? They are super cute!